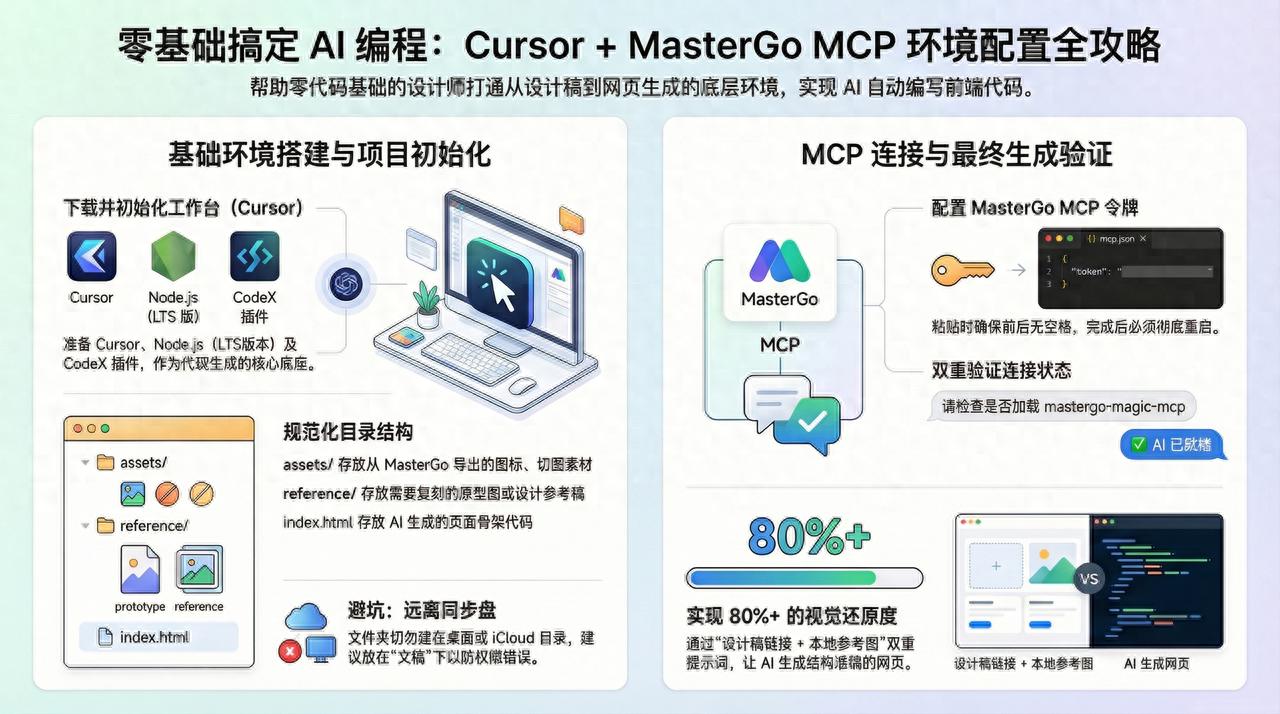
AI coding can be daunting for beginners, especially when it comes to environment setup. This guide walks you through configuring an AI frontend development environment using Cursor, MasterGo MCP, Node.js, and CodeX, with step-by-step instructions and tips to avoid common pitfalls. By following this tutorial, even those with no coding background can generate functional B-end pages based on design drafts.
Many without coding experience are eager to try AI coding but often get discouraged by the environment setup. This guide aims to simplify that process.
To ensure that AI generates pages accurately based on design drafts, you will need to work with MasterGo MCP.
I have compiled my own successful process to help those with minimal coding knowledge who want to experiment with AI frontend development.
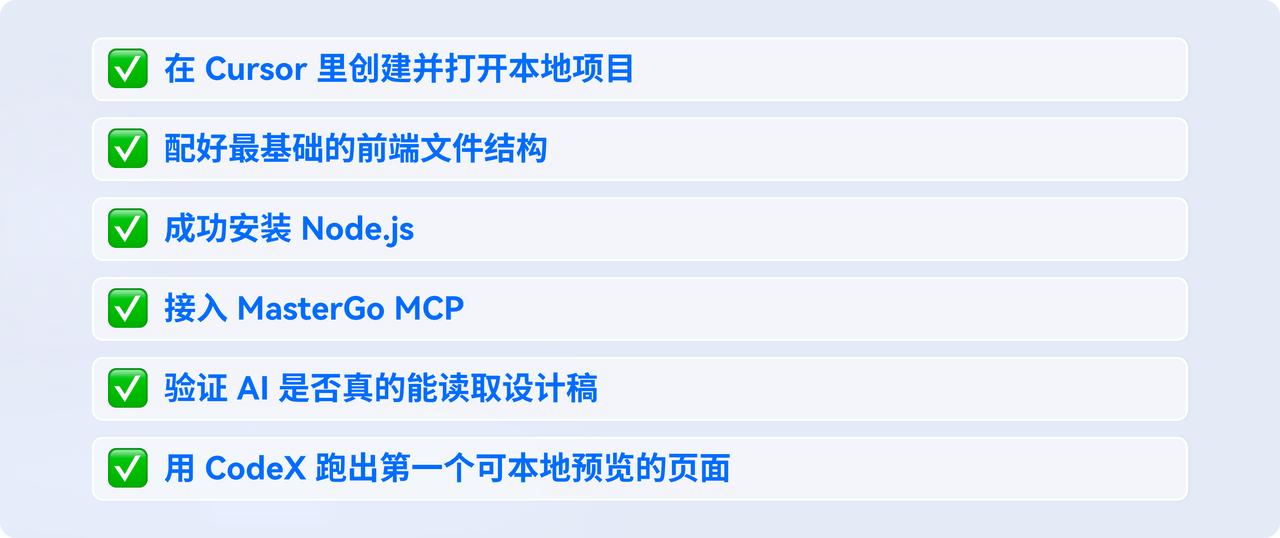
This tutorial focuses on getting the environment up and running. By the end, you will be able to:
If this is your first time setting up such tools, don’t worry; we’ll start from the basics.
Tools Required
1. Cursor
Cursor is the main workspace for this process and the primary tool for the team. Most of the project setup, code editing, page previewing, and MCP integration will be done here.
2. MasterGo
MasterGo provides the context for the design drafts. It allows the AI to reference specific designs instead of just guessing the layout.
3. Node.js
Many beginners find this step cumbersome, but it is essential. Node.js serves as the foundation for both MCP and local execution.
4. CodeX
I primarily use CodeX for generation and modification. New users of Cursor usually have a free quota to try it out. In my case, after exhausting my Cursor quota, I switched to CodeX that comes with ChatGPT.
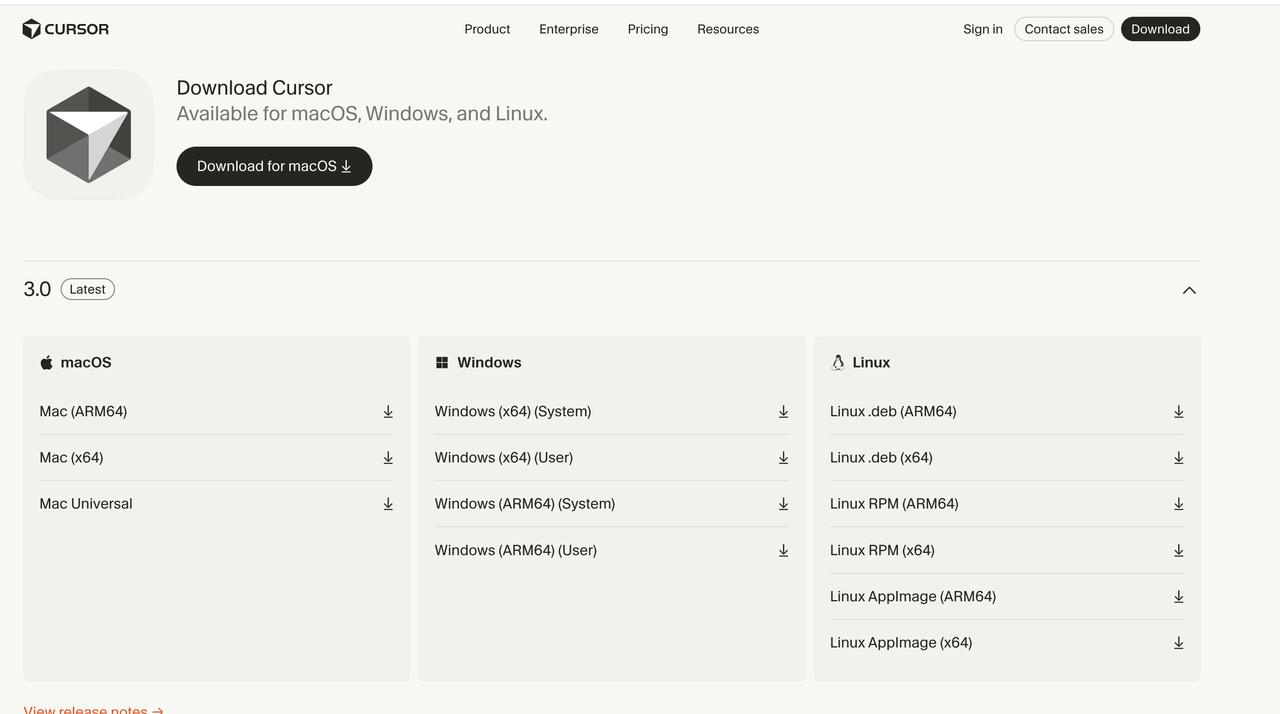
Step 1: Download Cursor
The editor we will use is Cursor, which is essentially an AI-enhanced version of VS Code. It looks identical to VS Code but has powerful AI capabilities built-in.
Download Instructions
Visit the Cursor official website to download the appropriate version for your system and proceed with the installation.
https://cursor.com/cn/download
Step 2: Create a New Project
1. Create a Local Folder
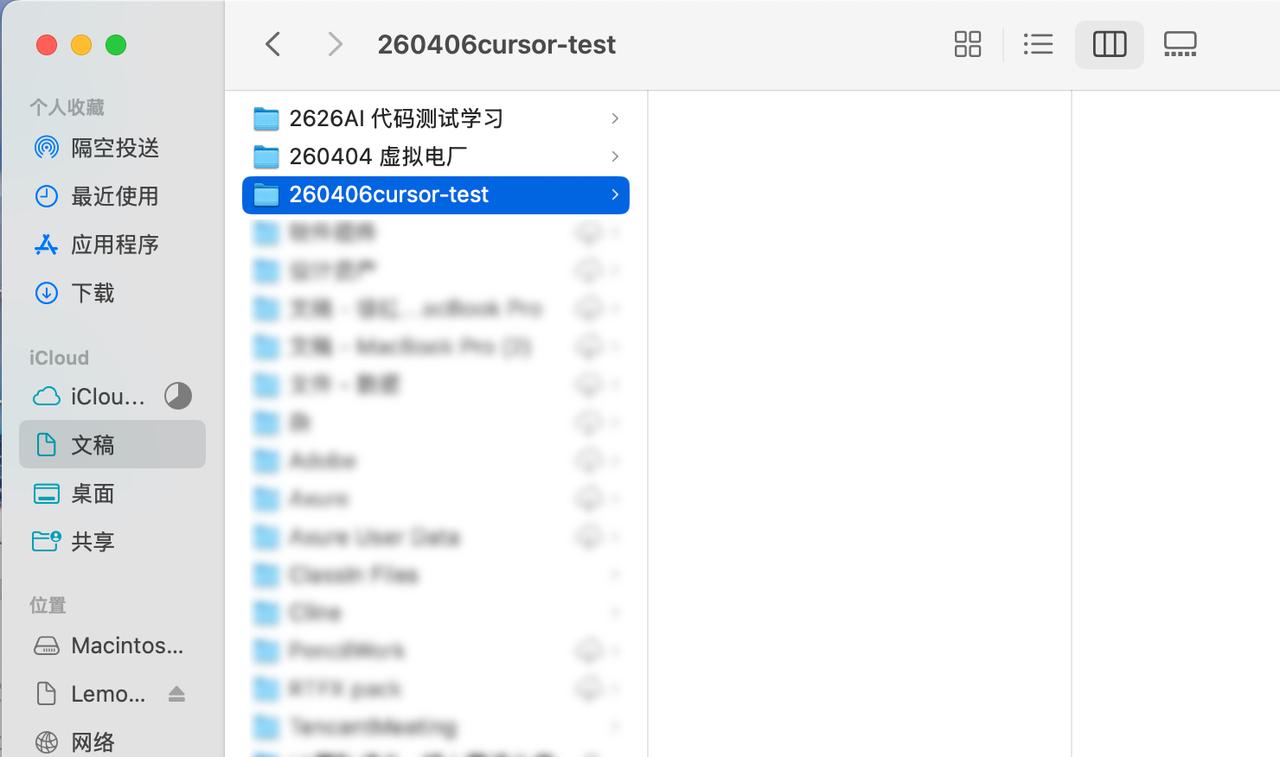
A common pitfall to avoid is creating the project directly on the desktop or in iCloud-synced directories. I found that placing the folder in a synced drive can lead to permission or sync issues. A safer approach is to create a folder named purely in English within your computer’s “Documents” directory.
For example, I named mine:
260406cursor-test
2. Open the Folder in Cursor
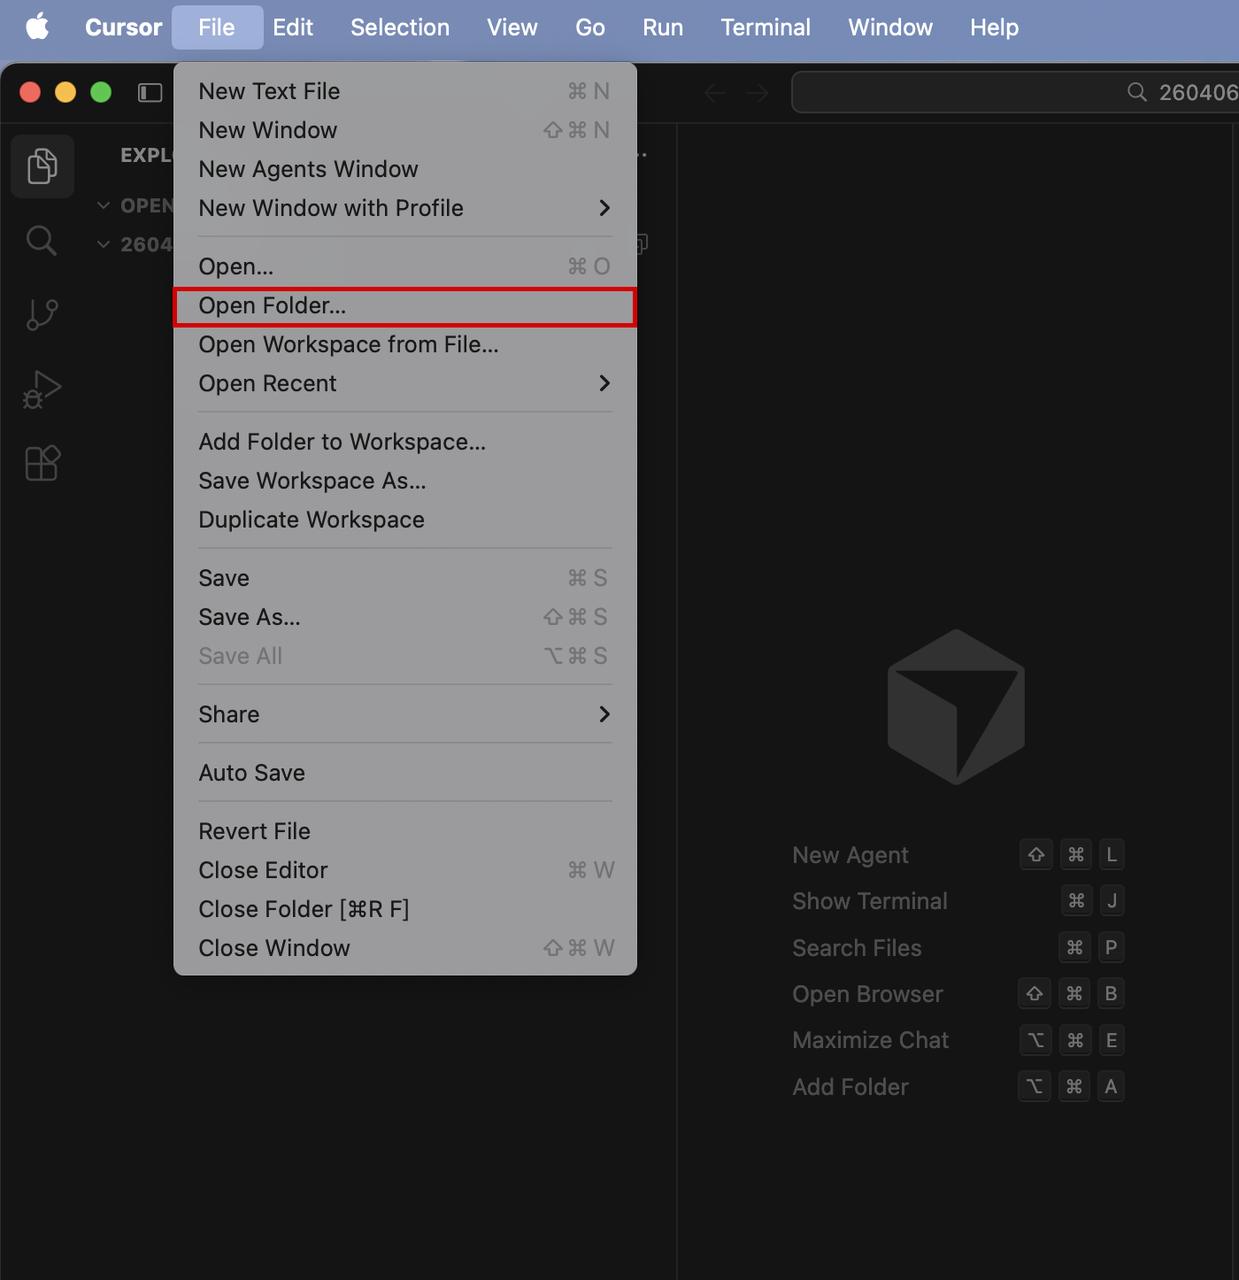
Open Cursor, click on File -> Open Folder… and select the project folder you just created.
Important Note: Make sure to select “Open Folder” instead of “Open”. Only by opening the entire folder can the AI access the complete project permissions.
3. Set Up Basic Project Structure
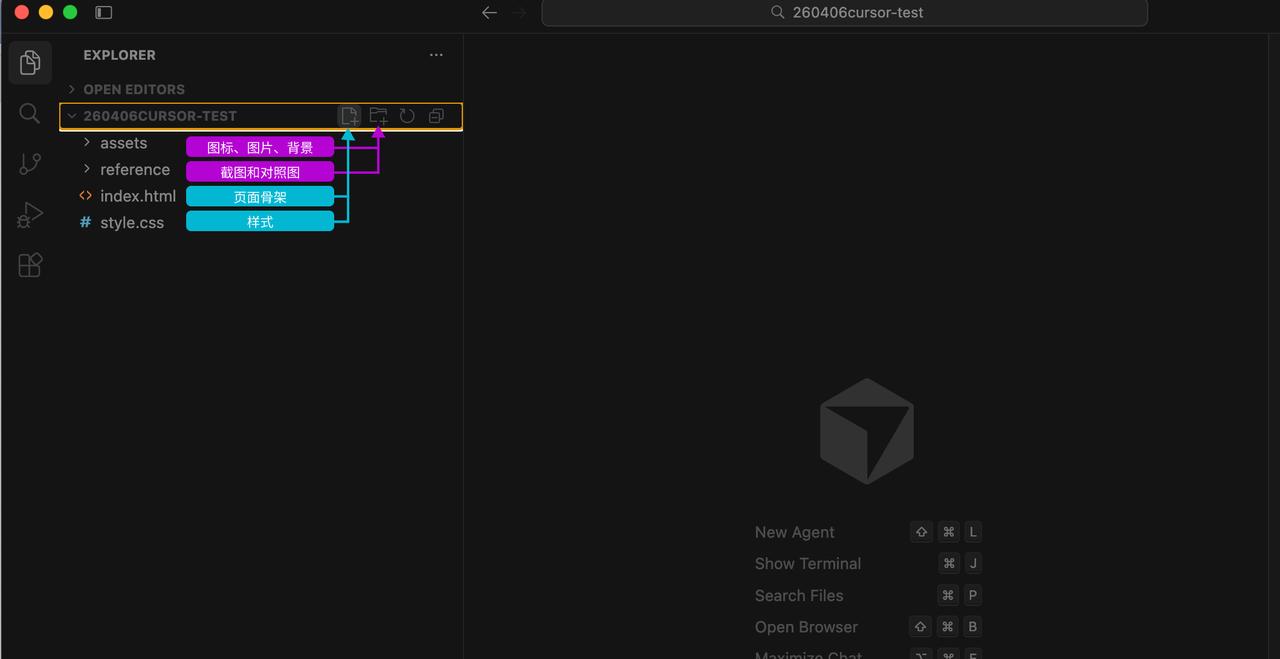
After opening, you will typically see an empty folder. Let’s set up the basic structure:
Hover over the 260406cursor-test folder, and you will see four floating icons.
Create Files: Click the file icon (paper with a + sign)
- Select New File
- Name it index.html
- Right-click to create style.css
Create Folders: Click the folder icon (folder with a + sign)
- Select New Folder
- Name the first one assets for image materials
- Name the second one reference for prototypes/design references
Why create these two empty folders? -assets: This is where we will place icons and images exported from MasterGo to keep paths organized. -reference: Place your prototype images and design drafts here. Later, we will instruct the AI to reference this folder to ensure it generates the layout accurately.

Step 3: Install Node.js
Many designers wonder why they need to install Node.js just to create a page.
The answer is simple: we want the AI to connect to MasterGo and read design information, and this requires MCP, which runs in a Node environment.
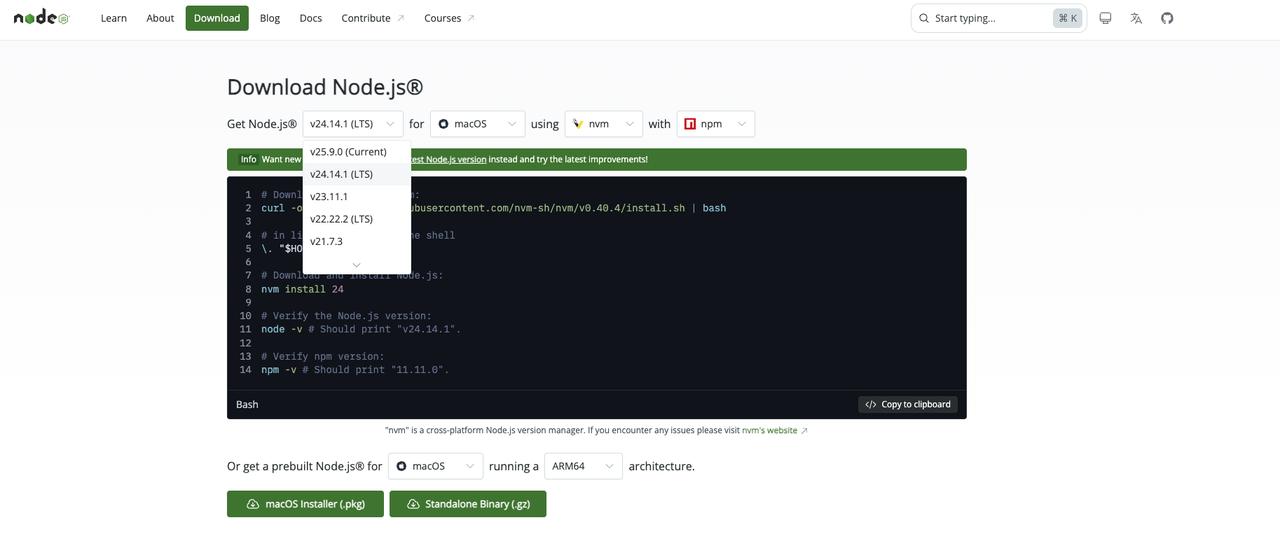
1. Download from the Official Website
Go to the Node.js official website to download. If unsure which version to choose, opt for LTS (Long Term Support). I downloaded version v24.14.1 without issues.
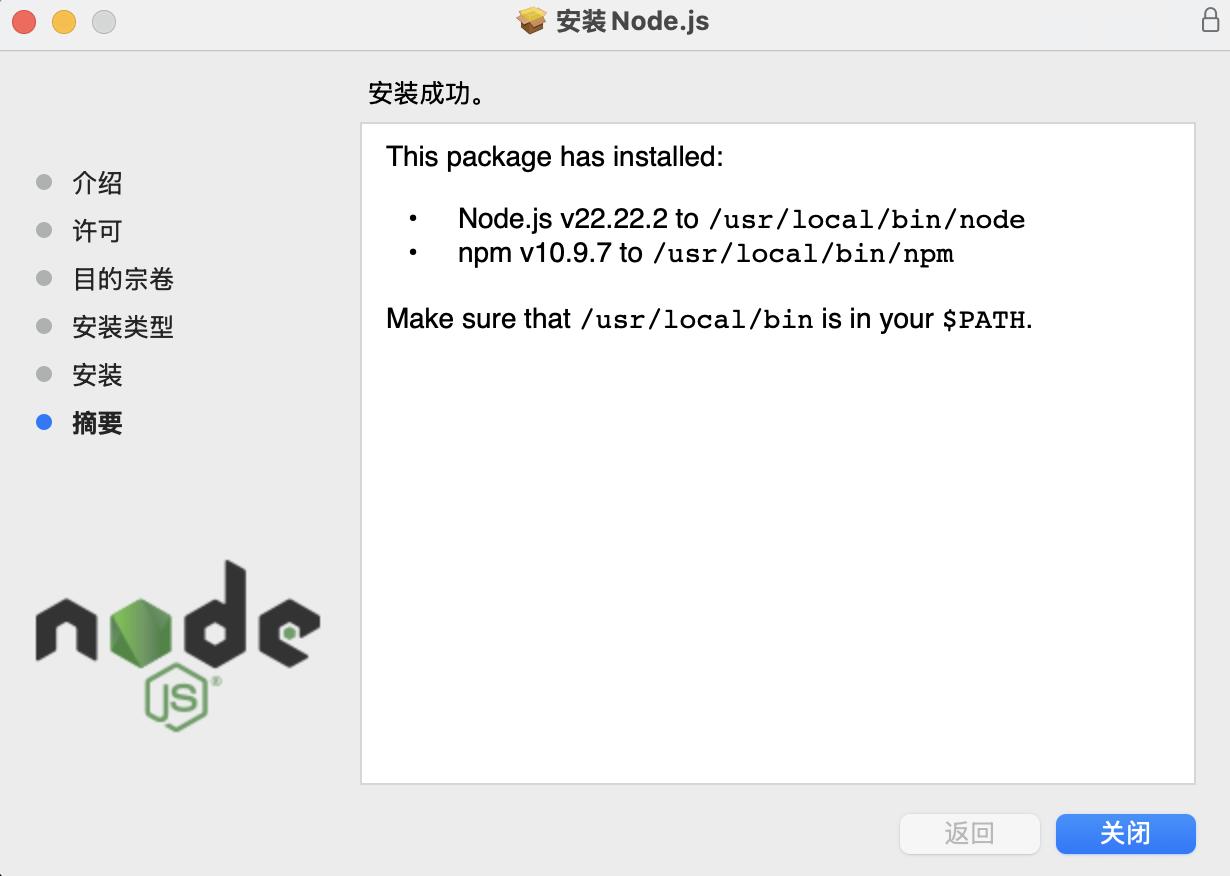
2. Installation
Install by clicking through the prompts.
Successfully installing Node does not mean the process is complete; the next step is crucial.
3. Verify Installation
Many people think they are done after installing Node, but they often encounter connection issues with MCP later. The simplest way to confirm is in Cursor:
Click on the top menu bar Terminal -> New Terminal.
Then type node -v in the TERMINAL:
node -v
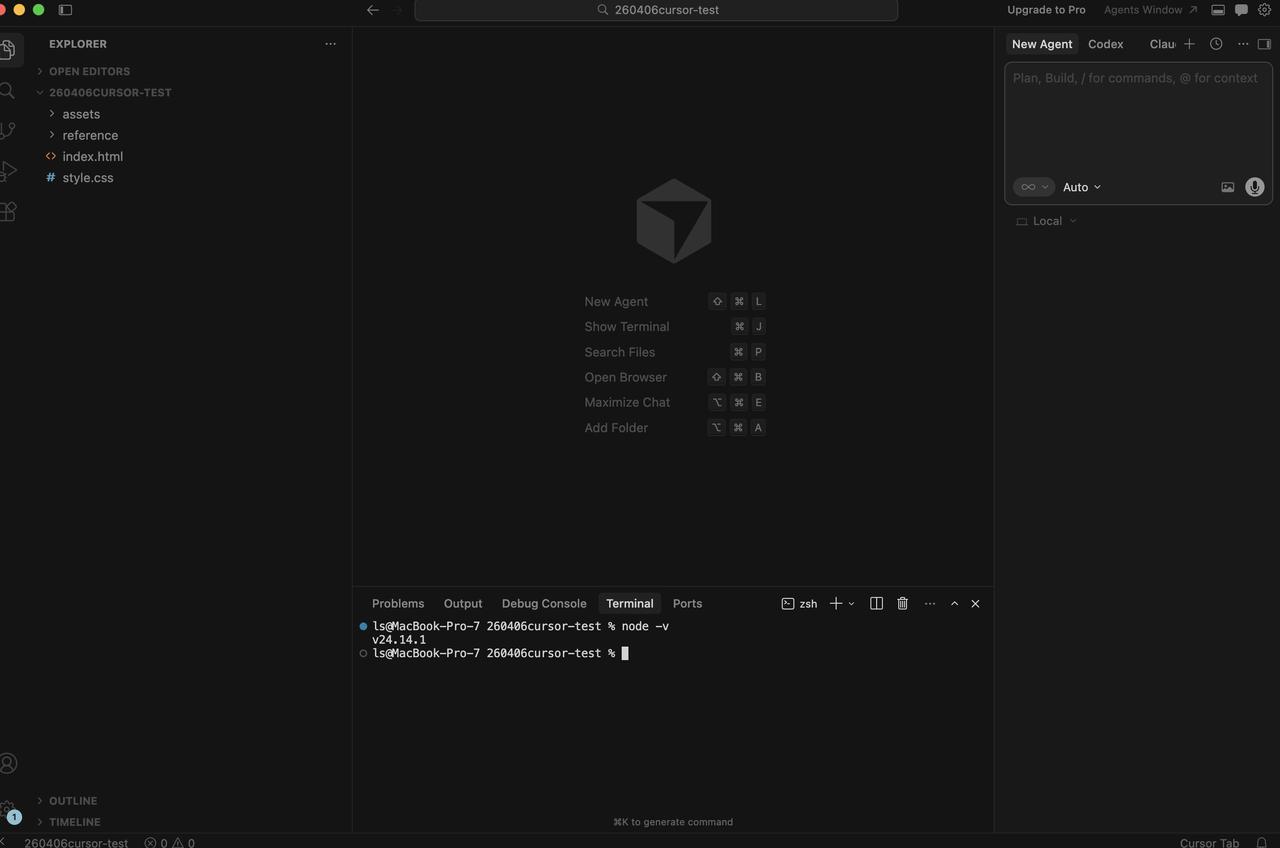
If you see a version like v18.x or v20.x, congratulations, you have installed it successfully. If you see “command not found”, it means the installation failed and you need to try again.
If you see a version number like v24.14.1, you are good to go. I installed a relatively new v24 version. Choosing the green LTS version from the official site is also perfectly fine. As long as you see a version number, the AI assistant can read MasterGo’s design data.
Step 4: Connect to MasterGo MCP
This step is the most critical in the entire process.
Once MCP is connected, the AI can read the structure and information from the design drafts instead of just guessing from screenshots.
1. Obtain Access Token from MasterGo
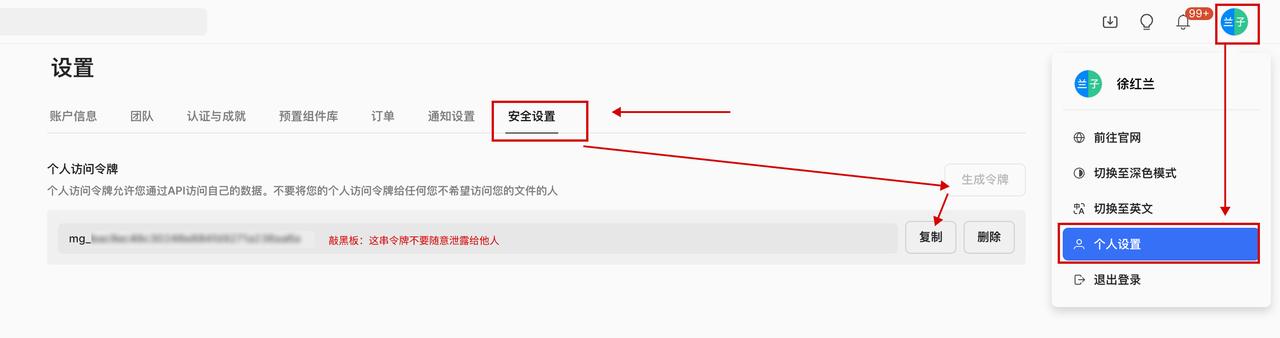
Open MasterGo, click on your profile picture in the top right -> Personal Settings.
Find Security Settings > Personal Access Token > Copy.
- Try to operate in a Business/Professional environment for better stability and fewer connection issues.
- Keep this token secure; do not share it carelessly.
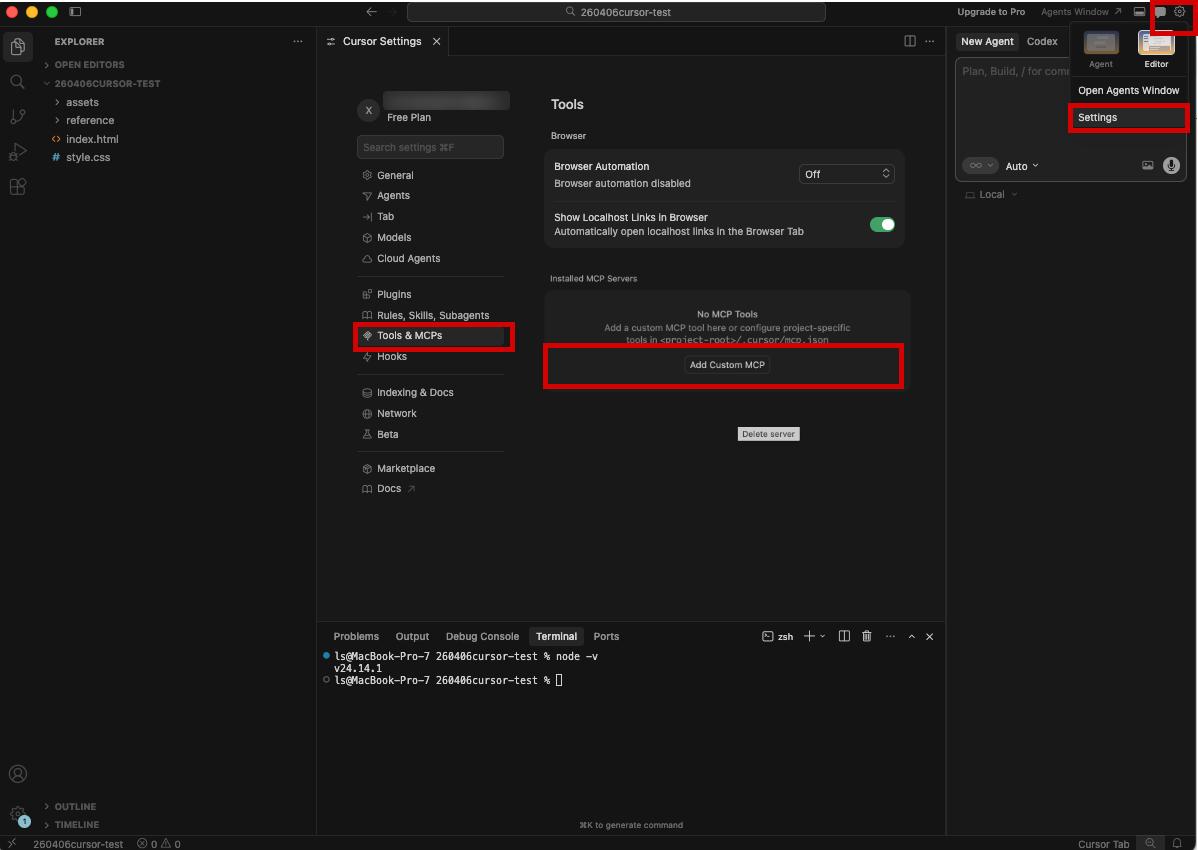
2. Open MCP Configuration in Cursor
In the Cursor settings page, find:
Tools & MCPs
Then add a custom MCP and enter mcp.json.
There are two ways to access the settings page:
Method 1
Cursor -> Preferences -> Cursor Settings
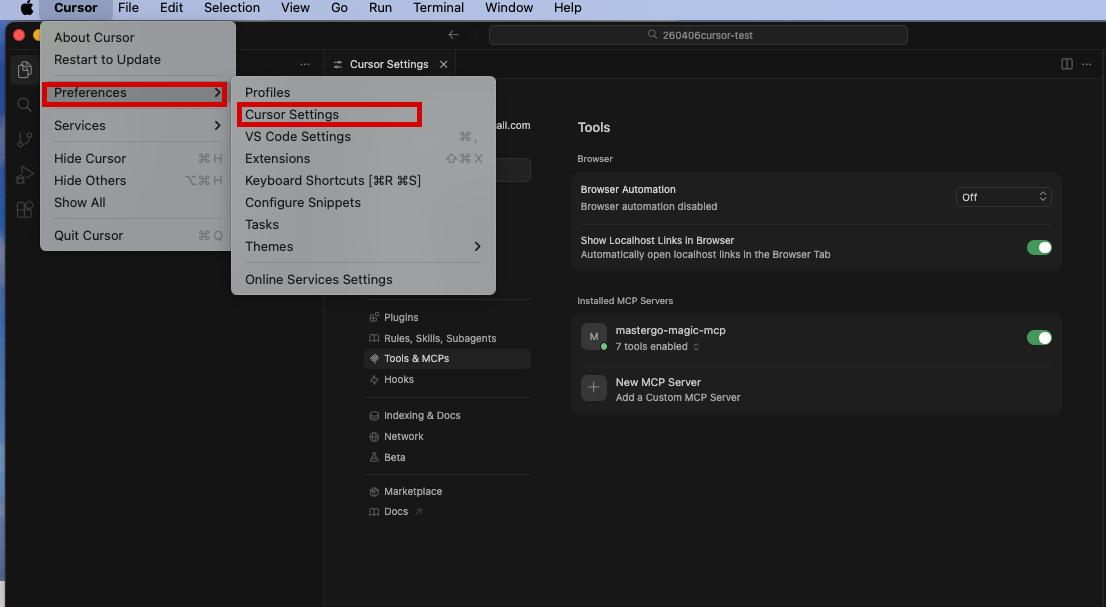
Method 2 Click the small gear icon in the top right
Then go to Settings -> Tools & MCPs -> + Add Custom MCP
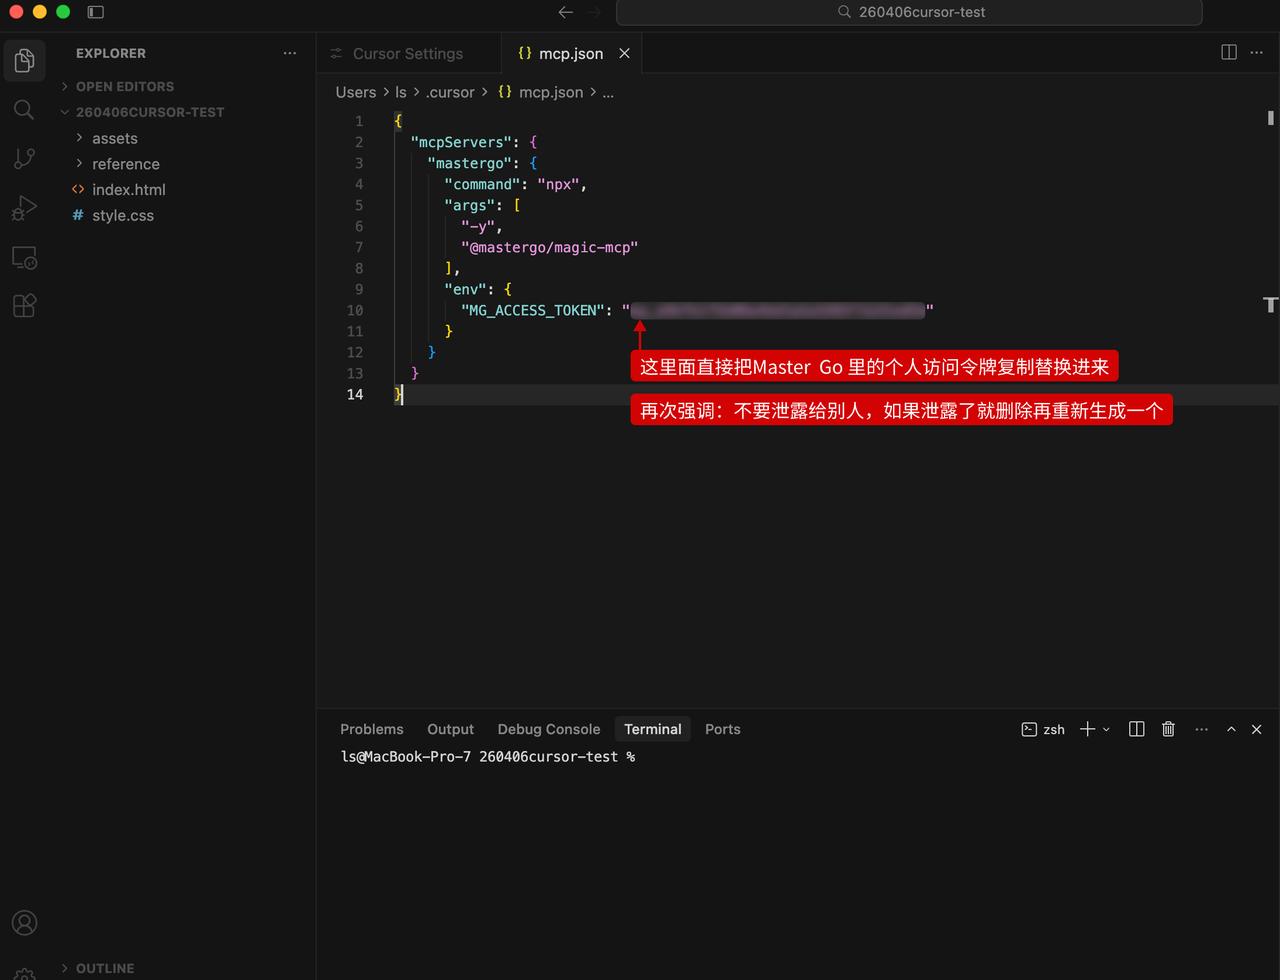
3. Modify the mcp.json Content
The official MasterGo documentation provides detailed instructions and several configuration methods. It is recommended to read the official documentation’s MasterGo MCP section.
https://mastergo.com/help/MG/MCP (For copying code blocks, it’s best to copy directly from the official site)
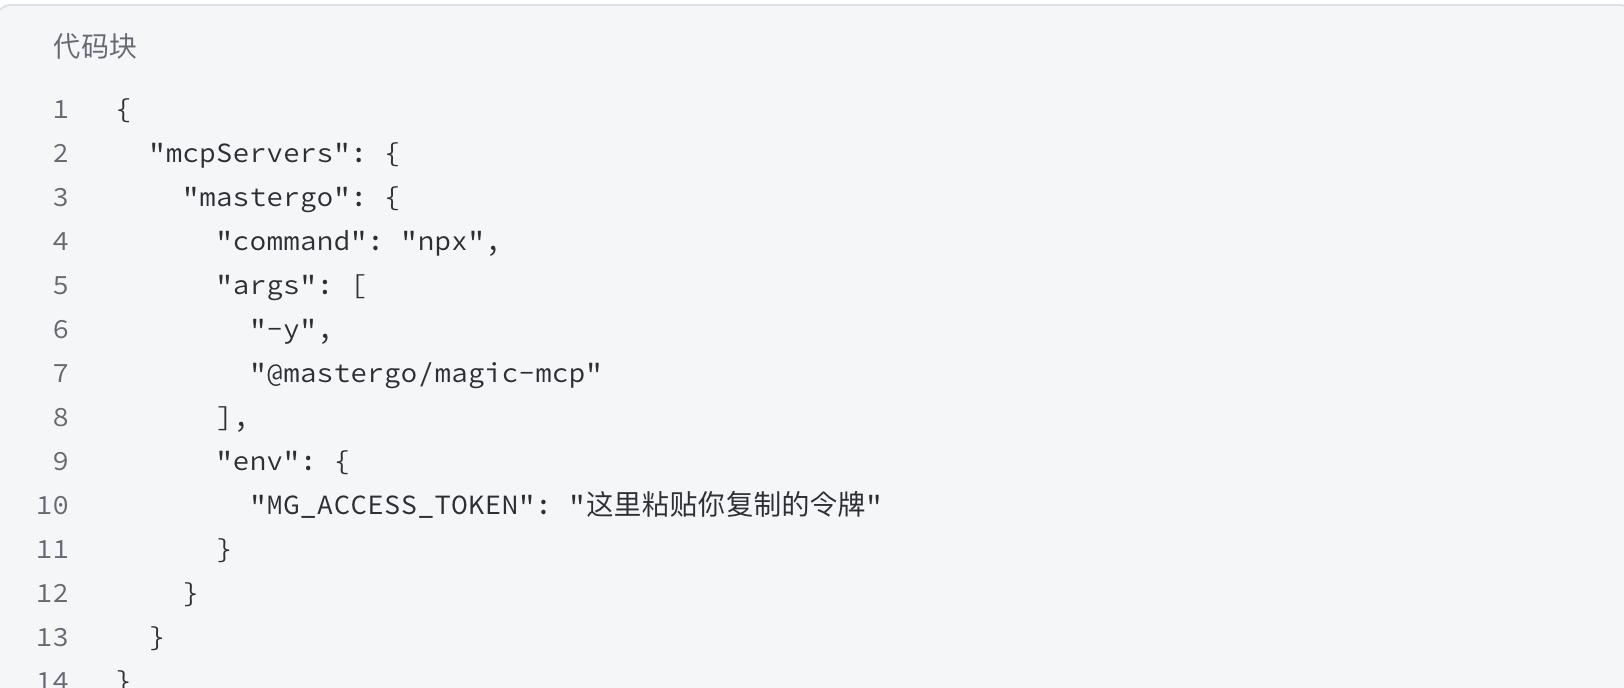
Alternatively, you can copy the following code into your mcp.json. For safety, I suggest clearing the entire file content before pasting:
{
  "token": "这里粘贴你复制的令牌"
}
Important Details:
- Replace “这里粘贴你复制的令牌” with the long string generated in MasterGo. Remember to keep the quotes.
- Spaces are a no-go: When pasting the token, ensure there are no spaces before or after, or the AI will prompt an “invalid identity” error during login.
4. Restart Cursor After Modifications
This action is crucial. Don’t just close the window or minimize it; you need to completely exit the application by pressing Cmd + Q to terminate the process and then reopen it.
Many MCP configuration changes only reload after a complete restart of Cursor.
5. Verify MCP Loading
Don’t just check if there’s a green dot in the settings page.
A more reliable method is to directly verify in the right-side session whether the AI can truly recognize the MCP tool.
In the Cursor right-side dialog, send this message:
“Please check if the mastergo-magic-mcp service has been successfully loaded. If loaded, reply with ‘Loaded’; if not, reply with ‘Not Loaded’.”
If it responds: Loaded, can call mastergo-related tools, can read design draft links, then you are mostly successful.
If the settings page looks normal but the session cannot access the tools, it indicates that the configuration was recognized but not successfully mounted in the current session. This was one of the deepest pitfalls I encountered.
If you encounter unresolved issues, the best approach is to take a screenshot and ask in forums or AI studio; current AI tools are the best teachers.
Step 5: Install CodeX
Cursor’s advanced models are paid, and once the quota is used up, you need alternatives.
I opted for CodeX after exhausting my quota.
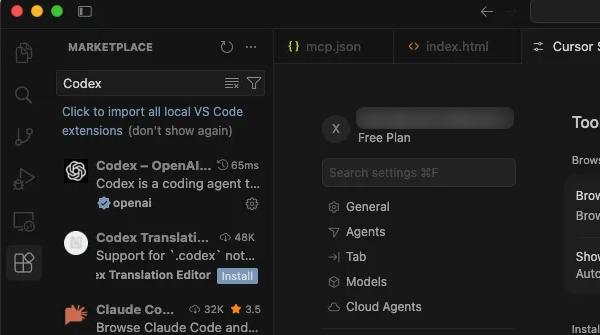
For beginners, I recommend installing the CodeX plugin, especially for ChatGPT paid users who have a usage quota included.
Installation Method: Click the small square icon on the left, search for CodeX in the extension market, and click Install.
Step 6: Final Verification
With the environment set up, let’s conduct a quick test. Start typing in the right-side dialog.
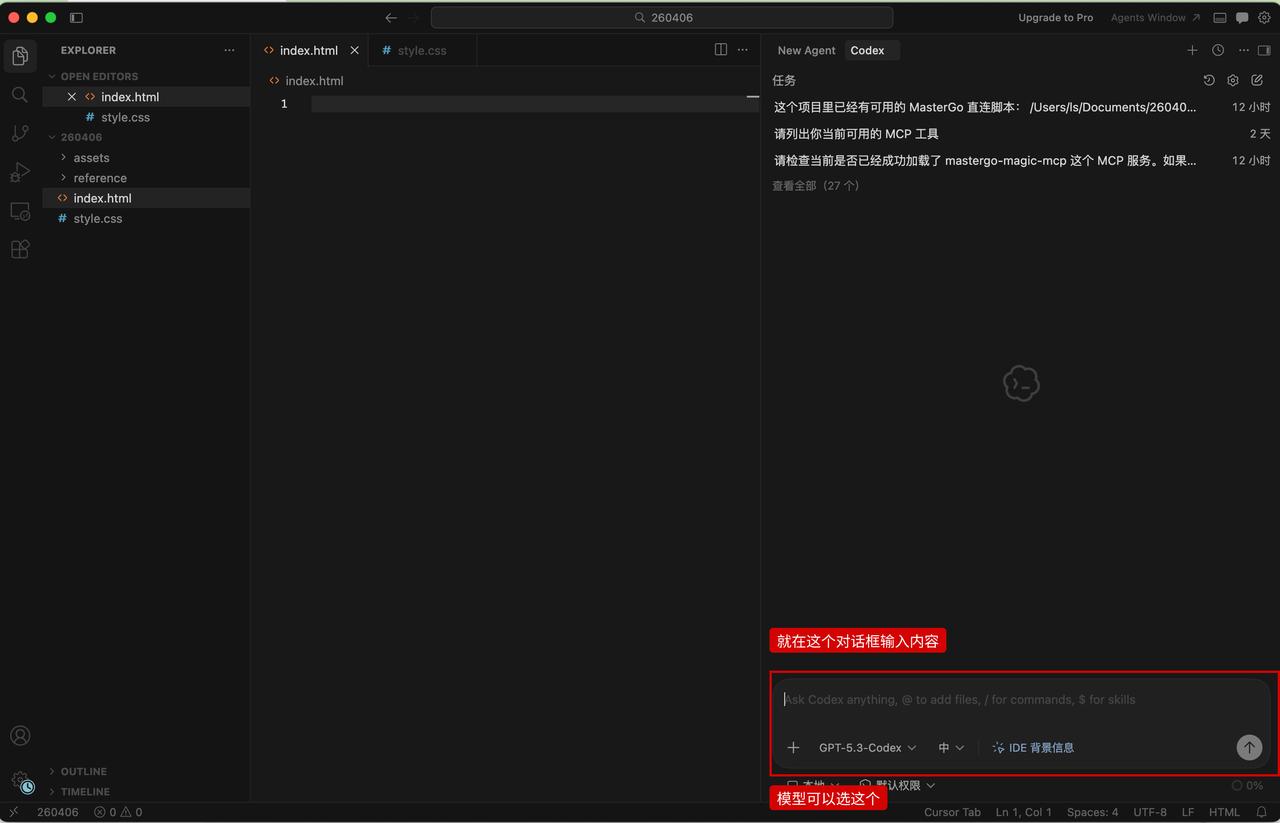
First Attempt
Tell the AI:
Please generate a locally runnable B-end page based on the current project.
MasterGo design draft link: 【https://mastergo.com/your_specific_file_address】
Requirements: Use index.html + style.css to organize the code.
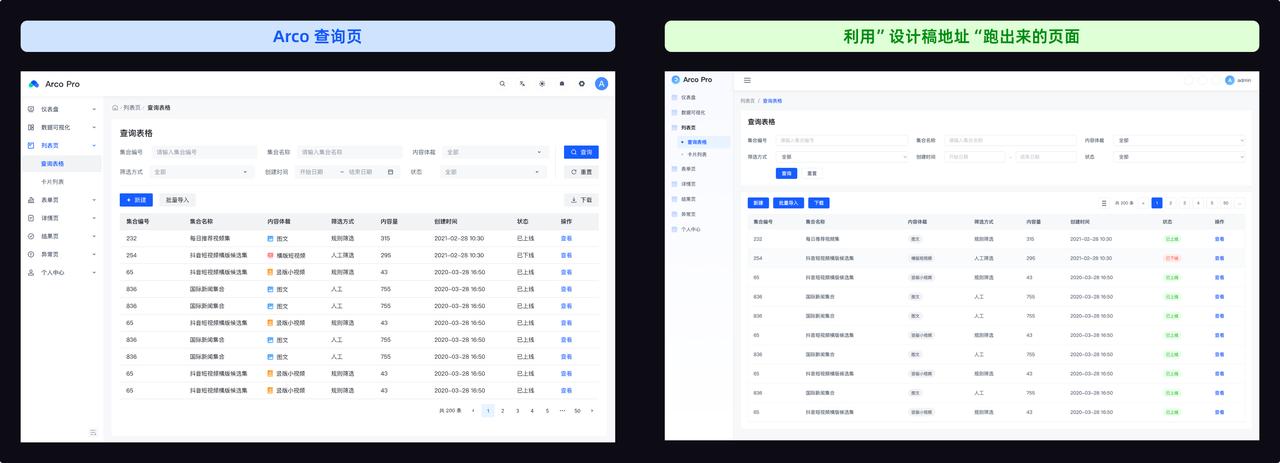
The left image shows an open-source file found online, and the right side shows the output from the first attempt.
You can see that the basic structure is somewhat accurate, though there are some structural issues and details to adjust.
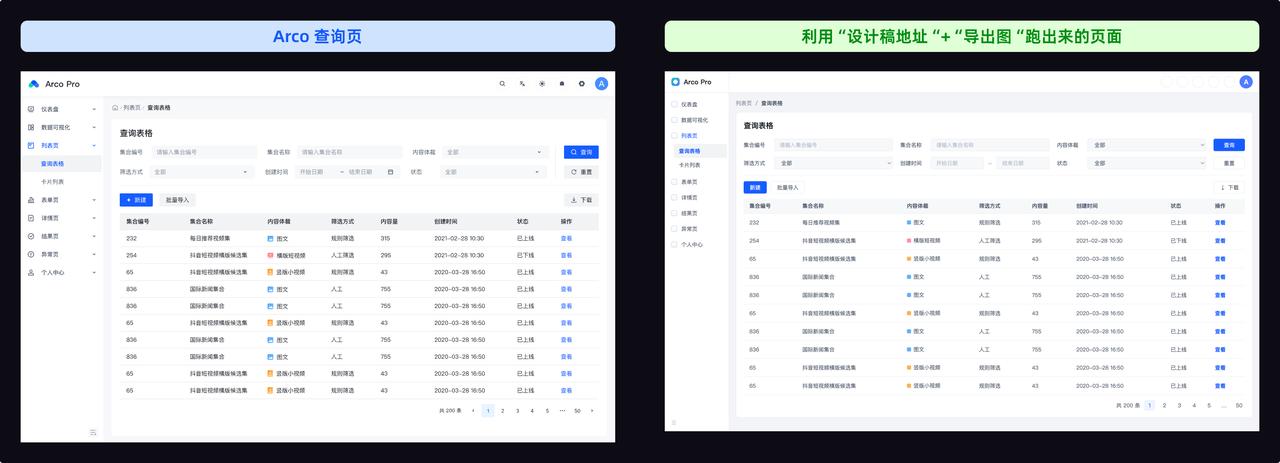
Second Attempt
This time, using both the reference image and design draft, you’ll notice that many structures become more accurate.
For example, areas like the filter section and header buttons are typically closer to the design draft than in the first round.
Tell the AI:
Please generate a locally runnable B-end page based on the current project.
Design references include two parts:
1. Local reference image: reference/image_name.png
2. MasterGo design draft link: 【https://mastergo.com/your_specific_file_address】
Requirements: Use index.html + style.css to organize the code.
How to Preview
You can click index.html in the folder, right-click to open it in a browser, or directly ask Codex to provide a preview link.
Conclusion
At this point, the environment is officially set up.
This article addresses the most fundamental yet discouraging part: connecting Cursor, Node.js, MasterGo MCP, and CodeX.
With the environment ready, the next steps will be much more interesting. In the next article, we will tackle a more complex dashboard page and see how accurately the AI can replicate it.
Feel free to give it a try, and if you have questions, don’t hesitate to leave comments!
Comments
Discussion is powered by Giscus (GitHub Discussions). Add
repo,repoID,category, andcategoryIDunder[params.comments.giscus]inhugo.tomlusing the values from the Giscus setup tool.